AntTweakBar GLUT example app using Xcode
Alec Jacobson
October 11, 2010
Here is a short tutorial to create a simple GLUT xcode project using the prototyping UI library AntTweakBar. I expect that you have compiled AntTweakBar as a static libary.
Create an xcode project
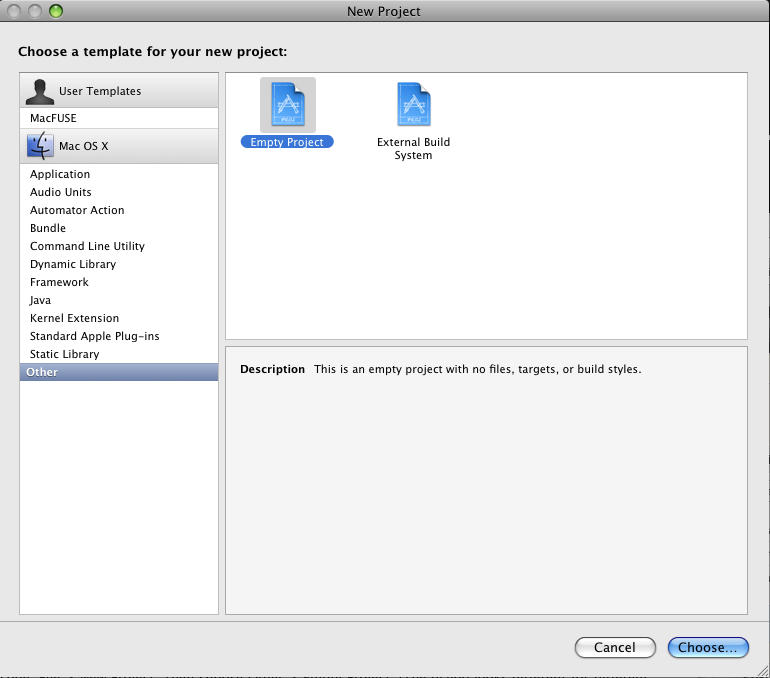
Open Xcode. File > New Project. Then choose Other > Empty Project. (The dialog looks different for different versions of Xcode, so just find "Empty Project" some place).
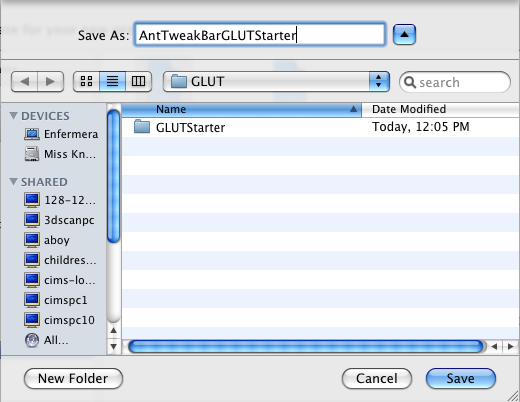
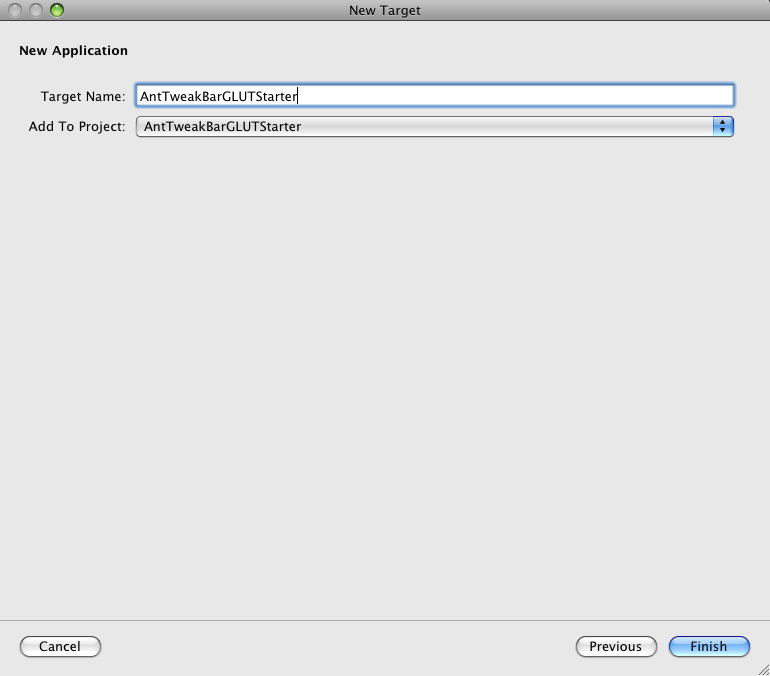
 Call your project: AntTweakBarGLUTStarter
Add a target executable
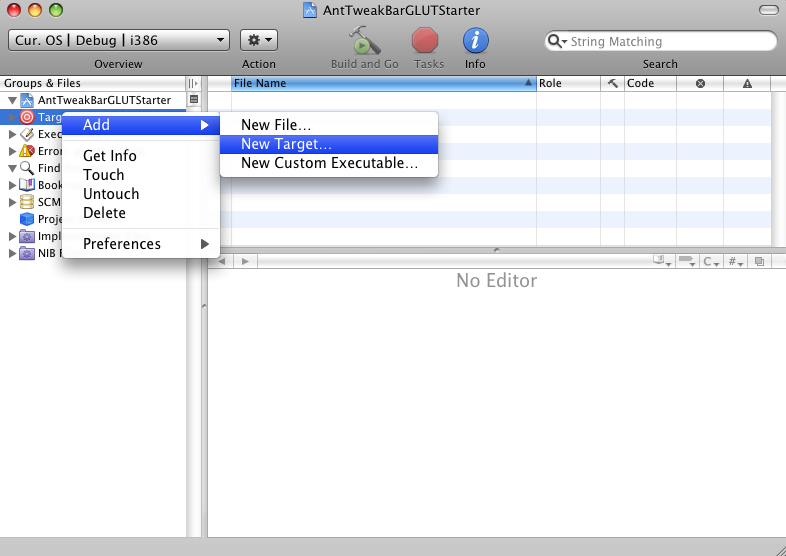
Right-click on Targets then select Add > New Target... (or go to Project > New Target...)
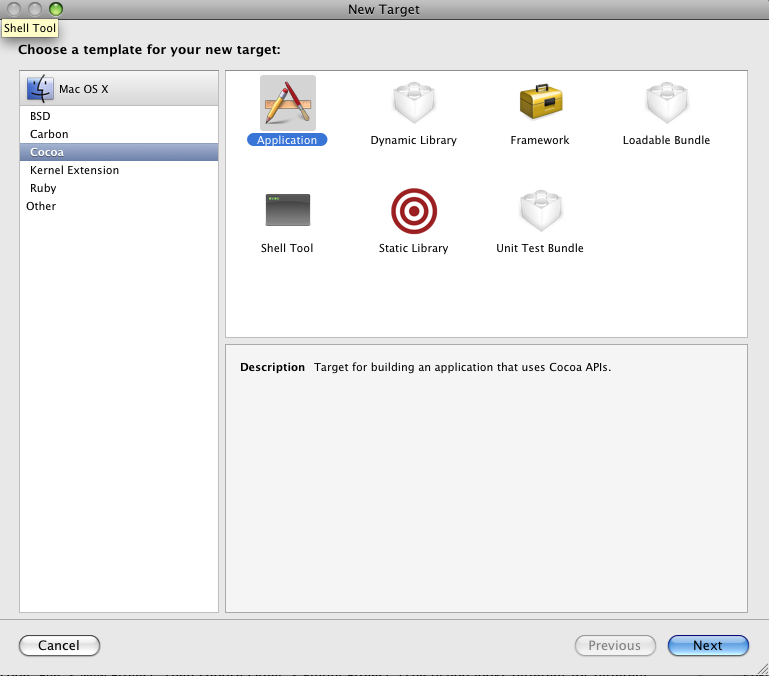
 Choose Cocoa > Application as the template of your new target (Don't worry we're not really making a cocoa app, it's still going to be in pure GLUT. This just helps make the bundle).
 Call your target: AntTweakBarGLUTStarter
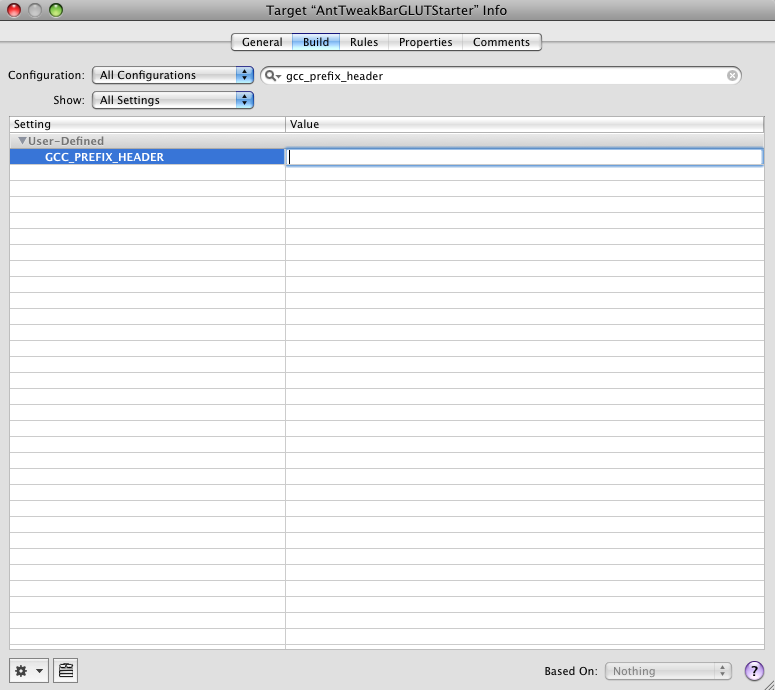
 Important:
Under the Build settings of your new target (Right-click on the AntTweakBarGLUTStarter target and select Get Info, then choose the Build tab), you need to remove the GCC_PREFIX_HEADER entry.
Important:
Under the Build settings of your new target (Right-click on the AntTweakBarGLUTStarter target and select Get Info, then choose the Build tab), you need to remove the GCC_PREFIX_HEADER entry.

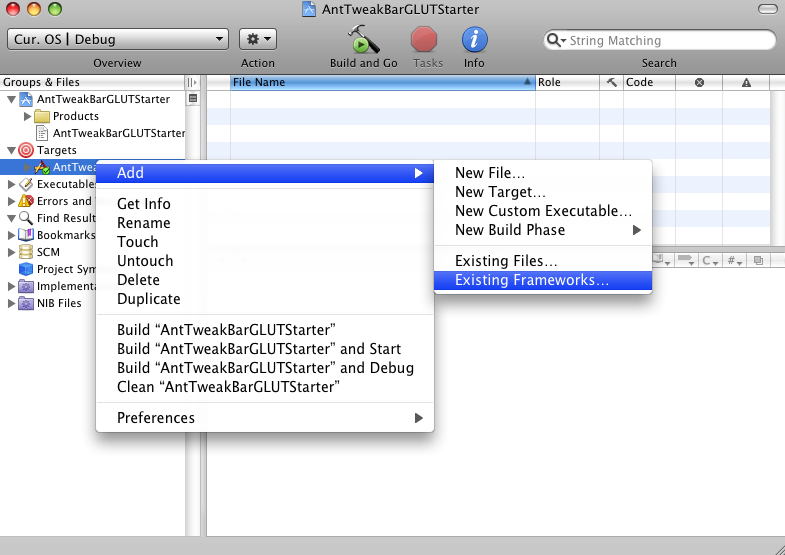
Link to libraries
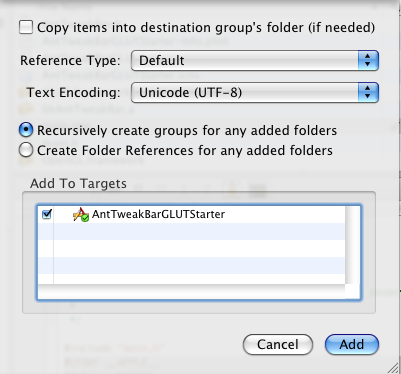
Right-click on your target and select Add > Existing Frameworks.
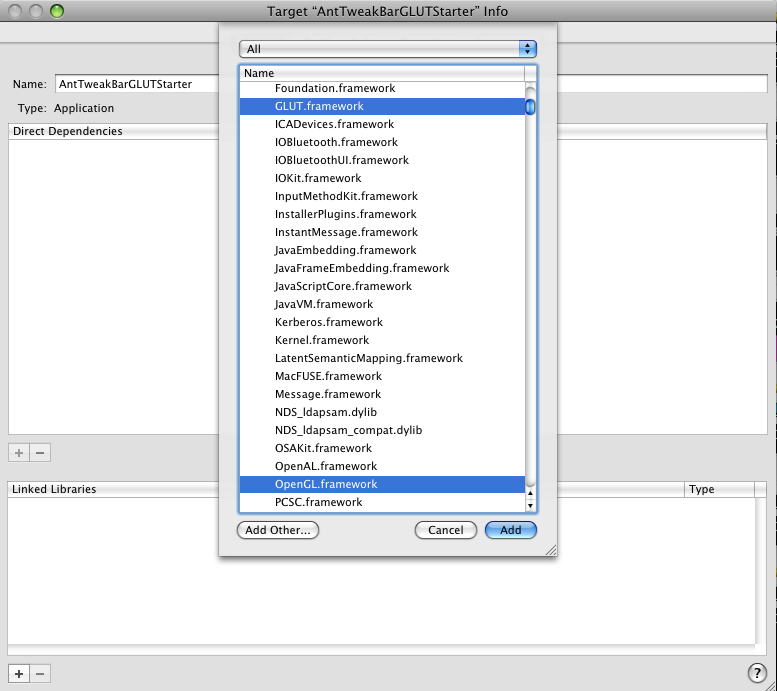
 This will open up your target's general info tab. At the bottom left click the "+" sign to add linked libraries. Select GLUT.framework and OpenGL.framework.
 Click the "+" sign again and then "Add Other...". Add your libAntTweakBar.a file. I always copy my external dependencies into a folder called [my xcode project]/external. So mine is located at AntTweakBarGLUTStarter/external/AntTweakBar/lib/libAntTweakBar.a
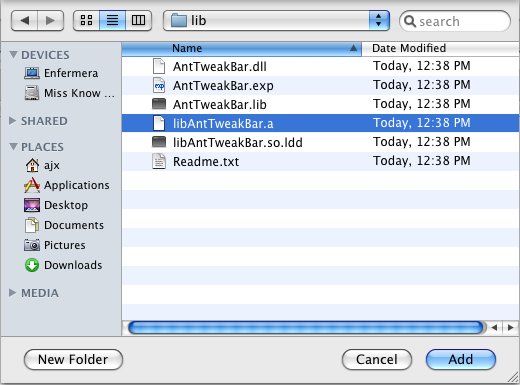 This will prompt you with some options. Just choose "add".

Add AntTweakBar header
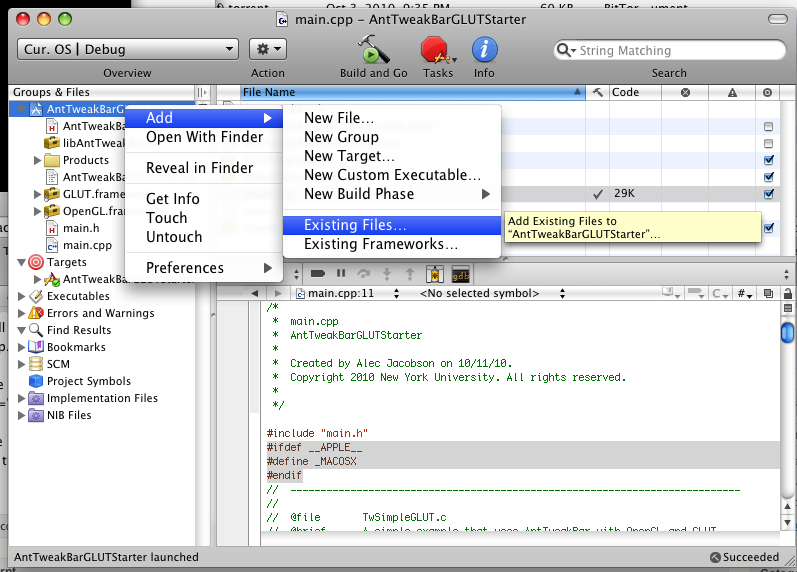
I'm not sure if there is a more pleasant way to do this. I add the AntTweakBar.h file directly to my xcode project. Right-click on AntTweakBarGLUTStarter > Add > Existing Files... .
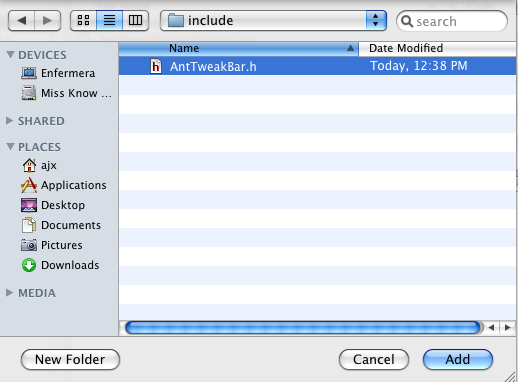
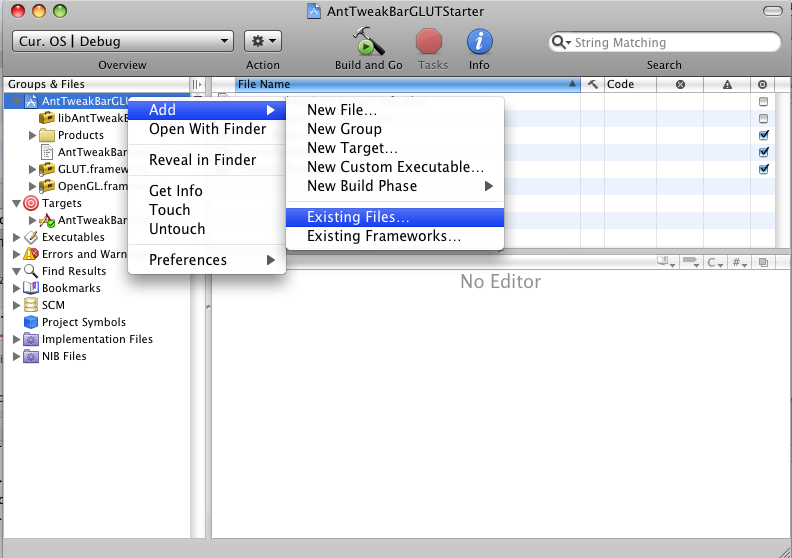 Then add AntTweakBar.h (mine is located at AntTweakBarGLUTStarter/external/AntTweakBar/include/AntTweakBar.h).
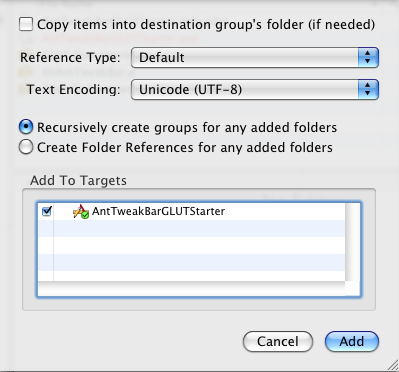
 Again, just click "add" at the prompt.
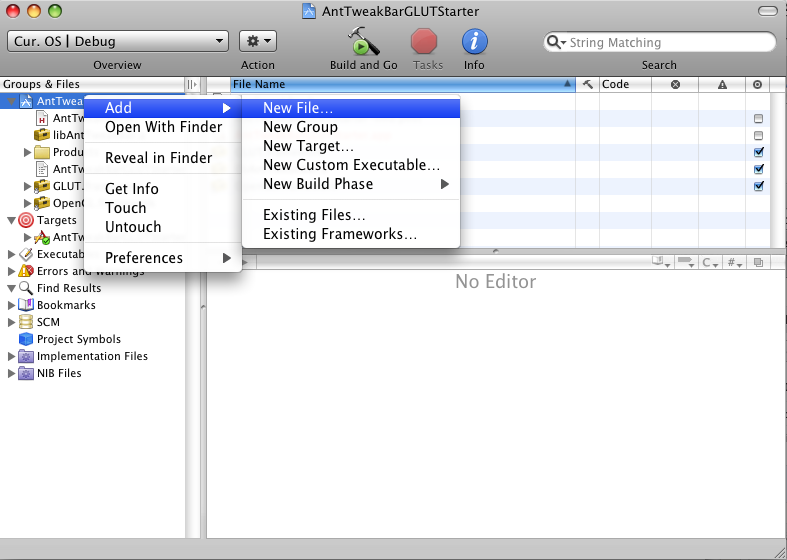
Create a main program
Right-click on AntTweakBarGLUTStarter > Add > New File.
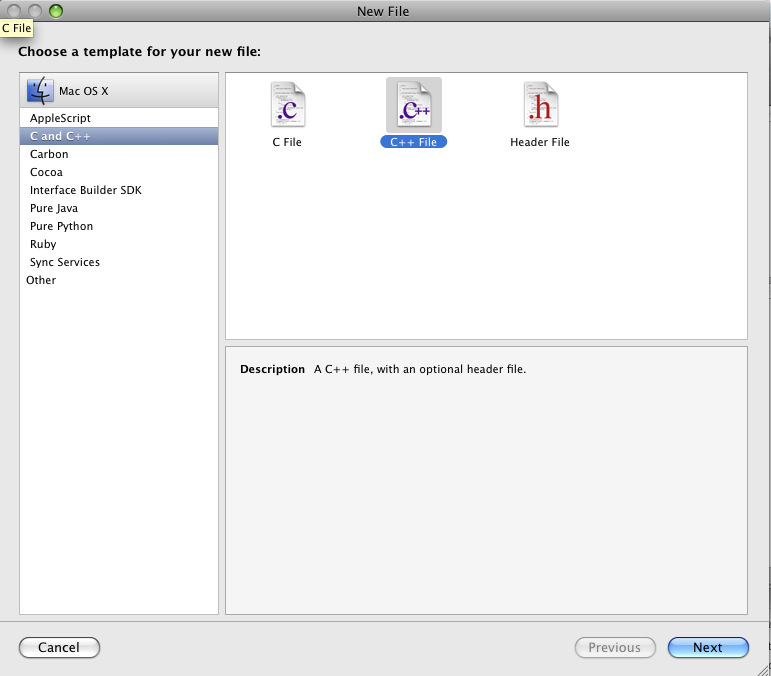
 Choose C++ file.
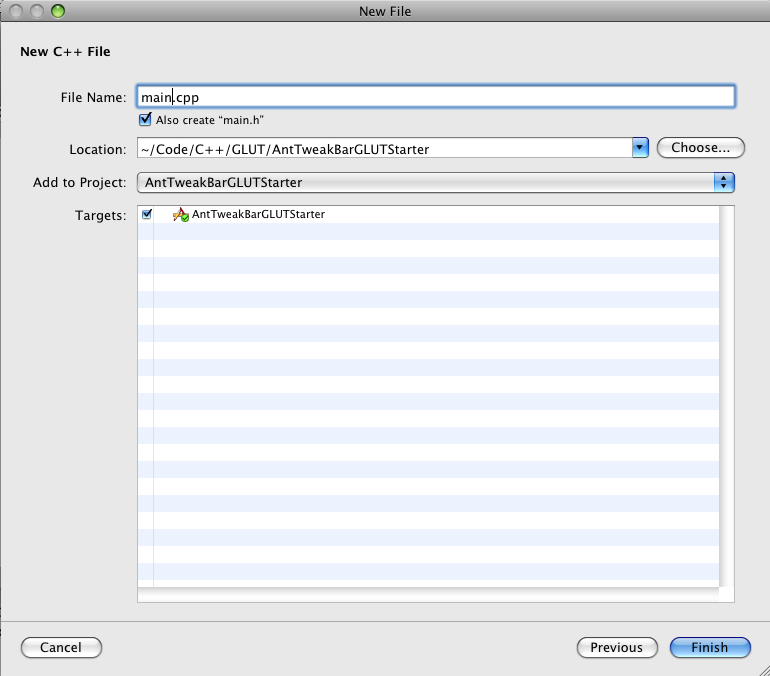
 Call it main.cpp
 Now you are ready to put whatever you want in your program. I copied the contents from the AntTweakBar GLUT example (TwSimpleGLUT.c) into main.cpp. This works almost as is. Just add at the very top you:
#ifdef __APPLE__
#define _MACOSX
#endif
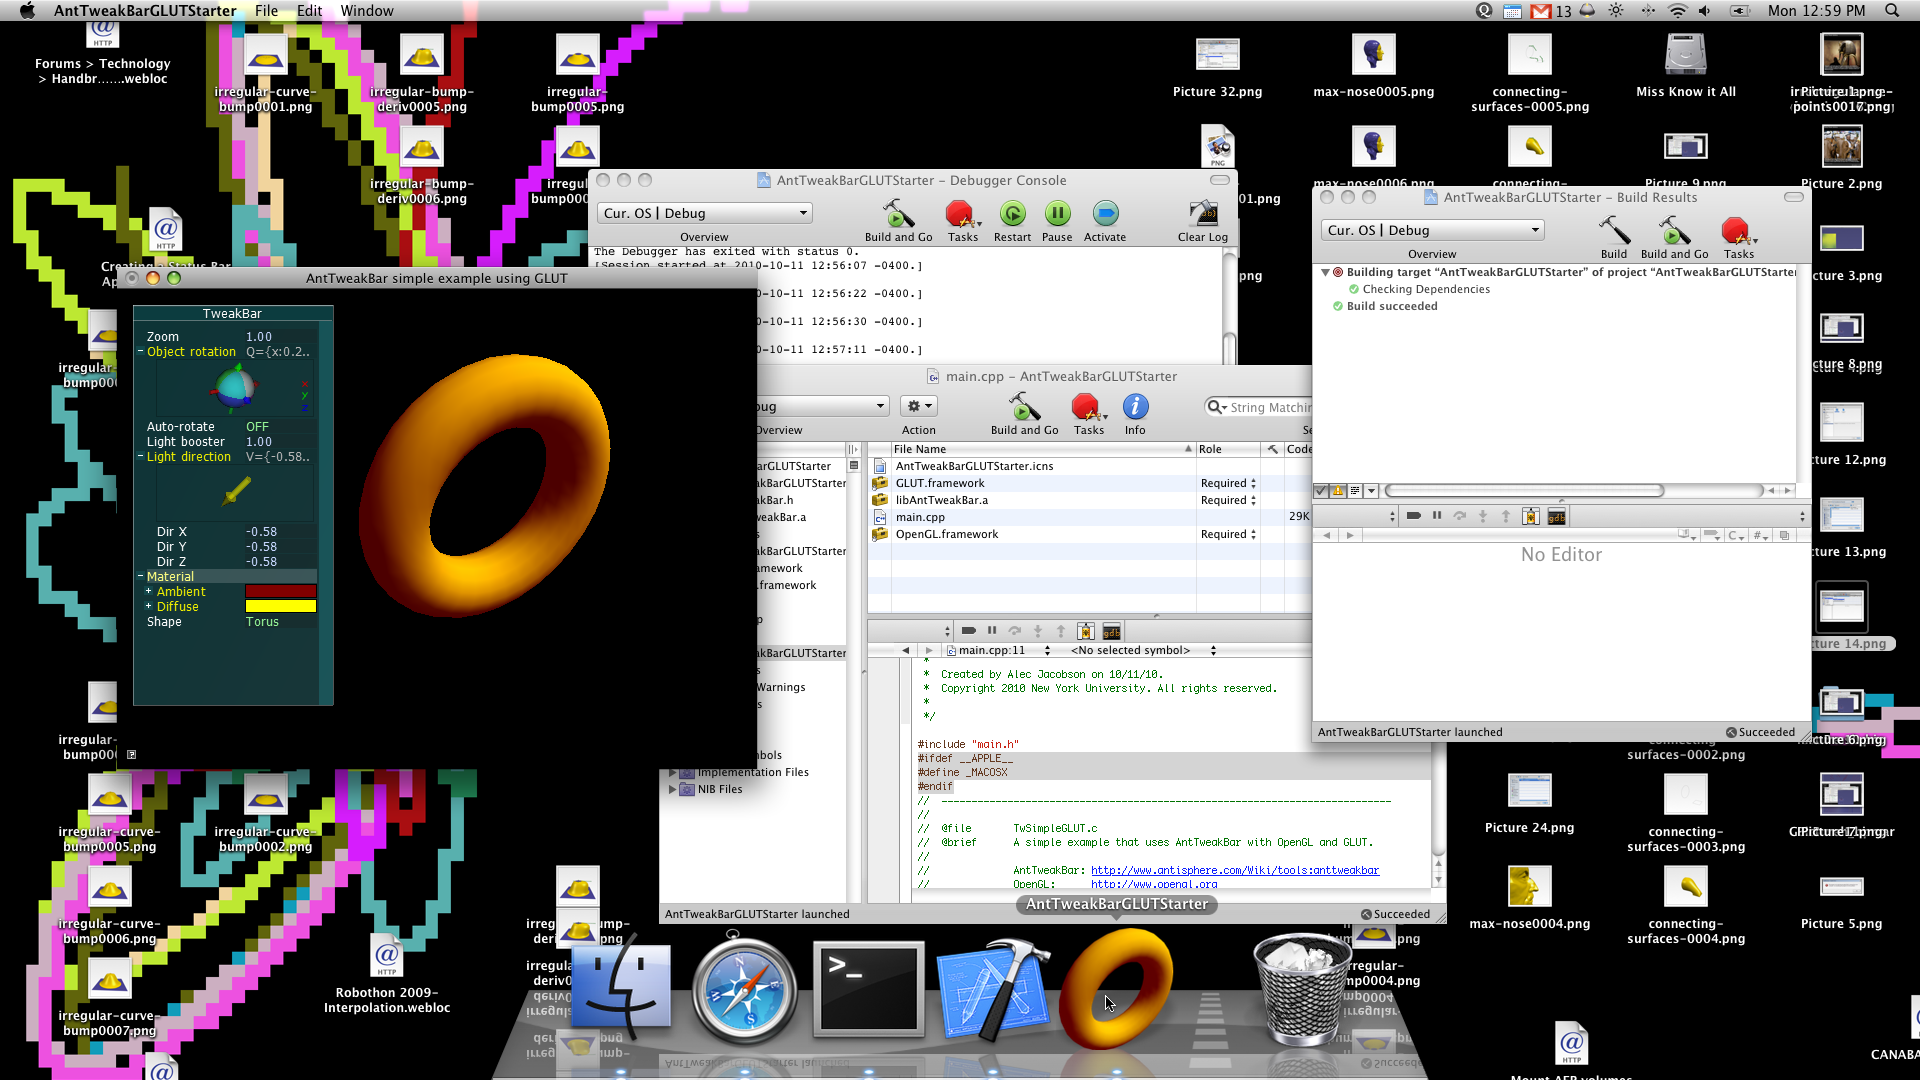
Build and go
Adding an icon
You'll see in the above screen shot that I have a beautiful dock icon for my app. This is very easy in the current setup.
Make some icon using Photoshop/Gimp whatever you like. I just save the image as a .png file and use http://iconverticons.com/ to convert it to a .icns file.
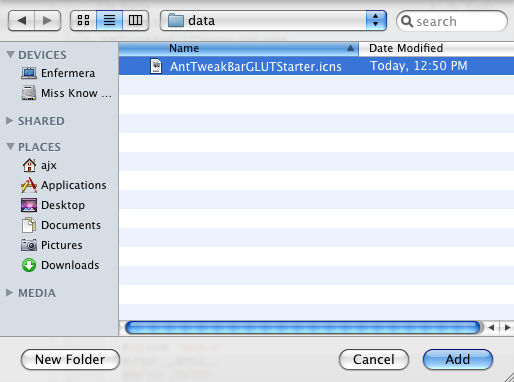
Once you have the .icns file add it to your project. I made a new folder AntTweakBarGLUTStarter/data and put my icon there: AntTweakBarGLUTStarter/data/AntTweakBarGLUTStarter.icns. So Right-click on AntTweakBarGLUTStarter > Add > Existing File.
 Choose your icon file.
 Again, just click "add" at the prompt.
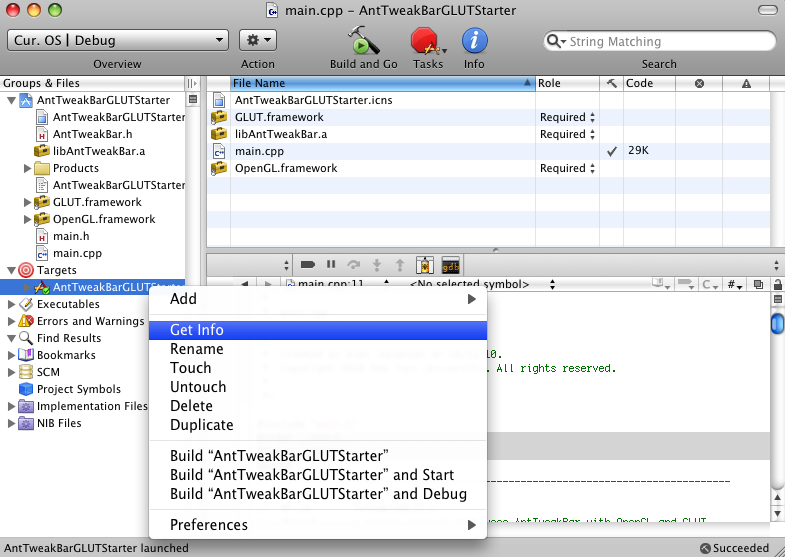
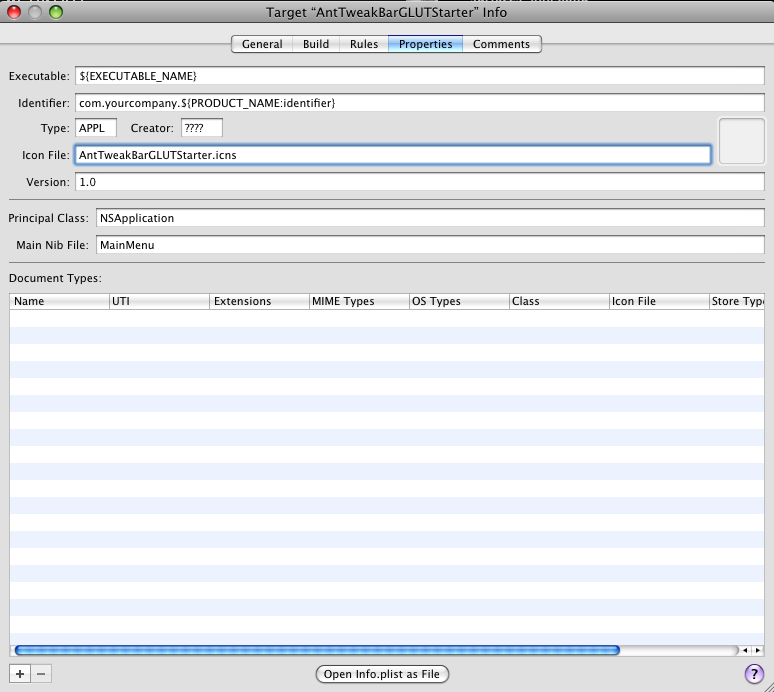
 To set this file as your icon Right-click on your target and select Get Info...
 Then choose the Properties tab. Under "Icon file:" type the name of your icon file.
Download
The source and .xcodeproj file in a zipped directory
The application binary (10.5 32-bits)
Source: The above is largely based off of: http://blog.onesadcookie.com/2007/12/xcodeglut-tutorial.html